How to Install macOS Mojave on VirtualBox on Windows PC with AMD Processor
I'll show you on how I install mac OS Mojave 10.14.3 HFS in my PC using Oracle VirtualBox
High level Specification of my PC:
- AMD processor
- 8GB RAM
- Windows OS
What is VirtualBox?
VirtualBox is a free software developed by Oracle. This software allows you to create a Virtual Machine controlled by either Linux, Windows or Mac. In other words, an operating system inside an operating system or a virtual computer inside of your machine.In order to start with the Steps we need the following software,
- Download VirtualBox in their official Website: https://www.virtualbox.org/wiki/Downloads
- I select Windows hosts since I'm using Windows OS
- Download VirtualBox Extension pack in their official website: https://www.virtualbox.org/wiki/Downloads
- Click 'All supported platforms' under VirtualBox 6.1.6 Oracle VM VirtualBox Extension Pack
- Download macOS 10.14.3 in my Google drive: https://drive.google.com/file/d/1HTe9pVKVcFWrGBzlTErUYnkaO6UN_TnY/view?usp=sharing
Steps to follow to Install macOS Mojave 10.14.3 on Oracle VirtualBox on Windows
Part 1: Install VirtualBox and Extension pack- Double click the VirtualBox-6.1.6-137129-Win.exe and install it on your preferred location. In my case I install it by default settings location which under C:\Program Files\Oracle
- To install Extension pack. Open Oracle VM VirtualBox Manager, Click File > Preferences > Extensions > Click Add new package and select the one that you've downloaded
- Open Virtual Box and locate the "new" button at the the top of the window. This will open up the wizard for creating a new Virtual Machine.
- Provide Virtual Machine Name "Eg. MacOS_Mojave", Type to Mac OS X, & Version to Mac OS X.
- Click Next Enter Memory size. (Eg. 4096MB)
- Click Next, Click 'Use an existing virtual hard disk file' and select the file you've downloaded in my Google drive.
- Click Create.
- Select the Virtual Machine that you created and click Settings.
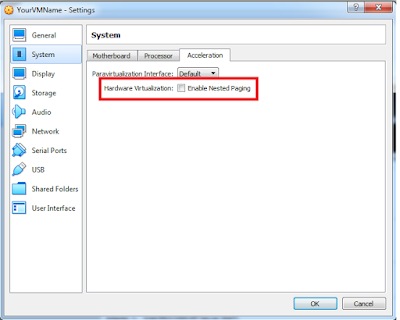
- Under System tab, uncheck Floppy and uncheck Hardware Virtualization under Accelaration tab.
- Under Display tab, set Video Memory to Max value (128 MB)
- Under USB tab, select USB3.0 (xHCI) Controller
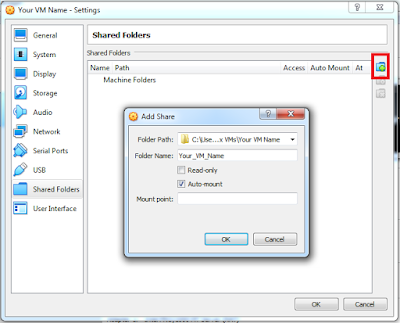
- Under Shared Folders, click the Add new shared folder icon and select the path. Check the Auto-mount option
- Open command prompt. On Windows search bar Type 'cmd' and Run as Adminstrator
- Change directory to Oracle Virtual Box installation path. cd C:\Program Files\Oracle\VirtualBox
- Copy and paste the code below then press Enter:
VBoxManage.exe modifyvm "Your VM Name" --cpuidset 00000001 000106e5 00100800 0098e3fd bfebfbffVBoxManage setextradata "Your VM Name" "VBoxInternal/Devices/efi/0/Config/DmiSystemProduct" "iMac11,3"VBoxManage setextradata "Your VM Name" "VBoxInternal/Devices/efi/0/Config/DmiSystemVersion" "1.0"VBoxManage setextradata "Your VM Name" "VBoxInternal/Devices/efi/0/Config/DmiBoardProduct" "Iloveapple"VBoxManage setextradata "Your VM Name" "VBoxInternal/Devices/smc/0/Config/DeviceKey" "ourhardworkbythesewordsguardedpleasedontsteal(c)AppleComputerInc"VBoxManage setextradata "Your VM Name" "VBoxInternal/Devices/smc/0/Config/GetKeyFromRealSMC" 1
VBoxManage modifyvm "Your VM Name" --cpu-profile "Intel Core i7-6700K"
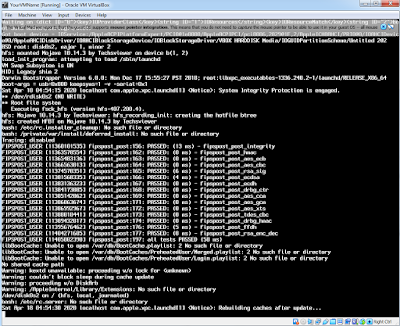
- Select and Click Start your Virtual Machine. This should take a while
- Setup MacOS
- That's all


No comments:
Post a Comment